Thursday, January 10, 2013

Sharpie Mugs

These were a gift, so I may never know if they survived the first washing, but I think they turned out cute!


Posted by Picasa

Thursday, November 3, 2011

30 before 30

It's been pretty drab here at this blog lately! Sorry. It's photo season and I've been very busy! www.iowawildflowerphotography.com

I've also been busy lately with a health challenge I'm doing with some friends. You throw $10 into the pot and then the person with the most points wins. You get points for eating 3 veggies, eating 2 fruits, not eating 2 hours before bed, not eating sweets, not drinking soda, getting 7 hours of sleep, taking a vitamin, drinking 48 oz water, and exercising an hour a day. So, I've been devoting more time to exercise and struggling to fight my sweet tooth addiction!

Also of note in regards to my hobbies, since this is a hobby blog, is my 30 before 30. I'll turn 30 in about 2 years. Yes, I'm young. Thank you for telling me.  I have a friend who made 30 goals to acchomplish before she turns 30 and I liked it so much, I did my own, too! Here it is:

  1. Visit 7 new states with Alex (Ohio, Indiana, West Virginia, Pennsylvania, Maryland)
  2. Plan 10 year anniversary vacation
  3. Read President Monson's Biography
  4. Learn how to make homemade tortillas
  5. Go Hang-gliding
  6. Get my name in Amy's Christmas letter
  7. Run a 5K
  8. Read 50 books
  9. Do a 1 mile Nauvoo Handcart Trek with the family
  10. Attend the temple 30 times
  11. Read the Book of Mormon in Spanish (El Libro de Mormon)
  12. Learn to knit
  13. Publish 100 blog posts
  14. Print 2 blog books
  15. Rekindle a friendship
  16. Make a new friend
  17. Do temple work for 10 ancestors
  18. visit 3 new temples
  19. Decorate my house
  20. Finish basement on House
  21. be in a musical (Community Theater)...
  22. taste 30 different types of frozen custard (Ted Drews, culvers, Kill Devil, Rita's)
  23. Try 3 new Iowa City restaurants
  24. write a novel
  25. Learn to play 30 songs on the piano (15 hymns, 15 children's songbook songs)
  26. Write a song
  27. complete Faith in God program
  28. Try 30 exercise videos


Yes, it's not finished yet- I still have 2 years, right? And, it may be changing, too, because my goals may change, and that is okay! Some goals are rather easy and will probably happen on their own and some are really rather challenging! (ehem... writing a novel? we'll see if that stays...)

So, I'm trying out 30 exercise videos and I have a feeling that it will not take very long at all to finish that goal. Luckily, our library has a large collection! Here's what I've tried so far and my reactions to them:

  • Cardio burn Dance for weight loss with Patricia Moreno
    • Review: dancy-pants. If you really like dance, you may like this. It was basically learning a dance routine. For me it was too tricky and not enough exercise/cardio/strength
  • Hemalayaan Bollywood Booty
    • This wasn't particularly cardiovacularly (not a word, spell check? should be.) challenging, but it was really rather fun!
  • Women'sHealth Perfect Body Workout with Amy Dixon
    • I think this was my favorite. Good work out, but not ridiculously hard. (aka, they did planks, but only 4 reps) Also, the girl talks about loving your body no matter what type. And, she's from Utah, so she say fun things like "o my heck" and she challenges us to pretend speed skating and fencing. 
  • Dancing with the Stars cardio dance
    • This was probably my favorite dancing video. That's probably because I"m actually familiar/comfortable with ballroom dance more than hip-hop. 
  • Barefoot cardio
    •  When at home, I like to exercise barefoot, so this was good. It seemed like a mash-up of all things barefootish- ballet, yoga, pilates, all with a good cardio heartrate. I liked it.
  • 10 minute solution Hip Hop dance mix
    • Skinny white girl pretending to be a rapper? I just couldn't get into it.
Well, there's six so far!

Monday, June 13, 2011

Banana bars

Another recipe asked for- from the same book! Those toll-house people really know their cookies! I made a double batch of these for a choir practice, and people loved them... and I had leftovers!


Banana Bars
from Toll-house Best-ever Cookies

2 cups flour
2 tsp baking powder
1/2 tsp salt
3/4 cup (1 1/2 sticks) butter or margearine, softened
2/3 cup sugar
2/3 cup brown sugar
1 t vanilla
1 cup (2 bananas) mashed ripe banana
1 egg
2 cups semi-sweet chocolate mini-morsels (I didn't have these, so I used about 1 1/2 cup ghiradelli's chocolate chips and 1/2 cup whit chocolate chips)
Sifted powdered sugar

Combine flour, baking powder, and salt in medium bowl. Beat butter, granulated sugar, brown sugar, and vanilla in large mixer bowl until creamy. Beat in bananas and egg. Gradually beat in flour mixture. Stir in morsels. Spread into greased 15x10" jelly-roll pan.

Bake in preheated 350degree oven for 20-30 minutes or until wooden pick inserted in center comes out clean. Cool completely in pan on wire rack. Sprinkle with powdered sugar. Cut into bars. Makes 6 dozen bars.

Sunday, June 5, 2011

recipe: swirl-of-chocolate cheesecake triangles

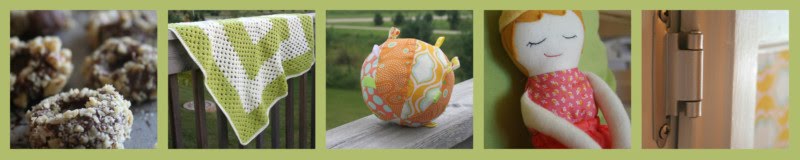
As a rule, whenever a friend asks for a recipe, I try to put it up here on the blog. Here is a great recipe for little cheesecake triangles. They are really easy and delicious. And still from scratch. And really rich and yummy. I kinda want one right now...

they're from this book:


 Which is full of really good recipes. I also love the mini chip snowball cookies. Apparently the book is only one cent... but in my cookbook library, it is a total classic!

swirl-of-chocolate cheesecake triangles
from Nestle Tollhouse best-ever cookies

crust:
2 cups graham cracker crumbs
1/2 cup (1 stick) butter or margarine, melted
1/3 cup granulated sugar
Filling:
2 packages (8 oz each) cream cheese, softened
1 cup granulated sugar
1/4 cup all-purpose flour
1 1/2 cups (12 fl. oz can) Evaporated milk
2 eggs
1 T vanilla
1 cup Nestle toll house ghiradelli's semi-sweet chocolate morsels

For crust:
Combine crumbs, butter, and granulated sugar in medium bowl; press into bottom of ungreased 13x9 inch baking pan

For filling:
Beat cream cheese, sugar, and flour in large mixer bowl until smoth. Gradually beat in evaporated milk, eggs, and vanilla extract.

Microwave morsels in medium bowl in Hugh power for 1 min, stir. Microwave at additional 10 to20 second intercals, stirring until smooth.

Stir in 1 cup cream cheese  mixture into chocolate. Pour remaining cream cheese mixture over crust. Pour chocolate mixture over cream cheese mixture. Swirl mixtures with spoon, pulling plain cream cheese mixture up to surface. Bake in preheated 325 degree oven for 40-45 min. or until set. Cool in pan to room temp on wire rack. Chill until firm. Cut into squares. Cut each square in half diagonally to form triangles. Makes 2 1/2 dozen.

Wednesday, May 18, 2011

Bungalow Bazaar

A couple weeks ago, I participated in this Bungalow Bazaar. Basically, lots of crafting friends joined together to sell their wares. My friend who hosted us has the cutest little Bungalow near downtown. She took out all of the furniture from her living room and dining room, we hauled in some tables, and everyone sold their stuff. I just joined in last minute for this, but they were at work on this for months in advertising, organizing, and of course, making things to sell.

It was so fun and such an educational experience for me. I have real respect for those who can actually make money by selling their handmade items here or on etsy. (I also have a lot of respect for those who actually make money blogging :) Unfortunately, I actually lost money on this endeavor so far.... my husband has a great eye for business, but apparently I don't! I made Magnetic dress up doll kits, which included everything you need to make one dress up doll. They were pretty cool and I sold about half of them. They were for kind of a select market, though. The things that sold best were really general items for any adult woman, like Jewelry, pillows, handbags, and key fobs. It was pretty close to Mother's day, so that may be another reason.


For my kits, I'll sell the rest at the next bazaar. I also advertized my photography business there. It was great to get a little more exposure! To be honest, in my preparation for this event, pretty much everything that could have gone wrong did go wrong. The printers were out of the photo paper I wanted and didn't print my orders on time, I sent other photos to the wrong stores, I had to run way more Errands than any person with a 2 month old should have, and I was scrambling to put everything together on the last night. It was kind of hectic to put it together in a week. It should have been easy, but it wasn't. But, saying all of that, it was still fun and has the potential to be really fun in the future!

Look at all of this beautiful stuff they made. Cute!

Beautiful quilts, cute bowties, lovely signs and home decor, lots of fun baby stuff... it was great!

Posted by Picasa

Thursday, May 5, 2011

Magnetic paper doll tutorial

Over the Weekend, I participated in a craft bazaar where lots of fun ladies came together and sold items that they made by hand. It was way fun! I was selling these magnetic paper doll kits. These are a lot like the old ones, but with a few changes. I used to stick the doll clothes onto recycled magnets using modpodge. I found that after a bit of use, the clothes would ften come detached. So, I started using adhesive magnetic sheeting. I condensed the clothes onto one 6"x6" sheet. Here are the photo instructions for the people who bought the kits, as well as anyone else who's interested!

You will need:
1 boy dress up print out
1 girl dress up print out
6x6 square adhesive magnet
Altoids can
Mod-podge
Colored pencils (or your coloring instruments of choice)
Paintbrush
Scissors

Instructions:
1. Color. I prefer using colored pencils. (If you use something else, test the crayon/marker/pen on a corner of paper and paint a little mod-podge on it to make sure the color doesn’t smear or run. )
2. Eat mints. Mmmm.
3. Cut. Don’t cut out the clothes individually yet! Cut along the heavy black line to make a 6x6 square. Compare it to your magnet to make sure it is the same size. Carefully cut out the Boy or Girl.

4. Stick. Very carefully stick the 6x6 magnet to the 6x6 clothing paper.

5. Cut again. Cut out the clothing very carefully. Tip: try to cut with straight lines as much as possible.

6. Cut some more. Trace the back of the Altoids can onto a piece of paper. Cut along your tracing. This will be your background. (An alternative to this step is to spray paint the outside of the Altoids can.)


7. Glue.  Glue the background Paper you traced onto the back of the Altoids can. Glue the paper doll onto the background paper. Carefully Paint over the paper doll and background. Paint over each of the clothing items with the mod-podge. (Painting the items with Mod-podge will make them more water resistant.)


8. Let Dry.
9. Play! This is perfect for doctors’ offices, car, church, or just to keep in your purse!


Posted by Picasa

Bunny Pizzas

During the Easter season, we came up with this really fun festive food idea. We make homemade pizza a lot at our house. Usually we just use the Artisan bread in 5 minutes a Day dough for the crust, roll it out, sauce and cheese it and stick it in the oven. It's pretty easy.

For Easter, we did the same thing, but after we rolled it out, we cut out these bunny shapes and threw them on a sprayed pan. Then, we just topped each of them. You could do it with other shapes- I just wouldn't choose anything with much detail because they stretch a little and rise a little.


Serve it with some edamame and of course, root beer. Everybody loved this little festive meal!

Posted by Picasa