Wednesday, May 18, 2011

Bungalow Bazaar

A couple weeks ago, I participated in this Bungalow Bazaar. Basically, lots of crafting friends joined together to sell their wares. My friend who hosted us has the cutest little Bungalow near downtown. She took out all of the furniture from her living room and dining room, we hauled in some tables, and everyone sold their stuff. I just joined in last minute for this, but they were at work on this for months in advertising, organizing, and of course, making things to sell.

It was so fun and such an educational experience for me. I have real respect for those who can actually make money by selling their handmade items here or on etsy. (I also have a lot of respect for those who actually make money blogging :) Unfortunately, I actually lost money on this endeavor so far.... my husband has a great eye for business, but apparently I don't! I made Magnetic dress up doll kits, which included everything you need to make one dress up doll. They were pretty cool and I sold about half of them. They were for kind of a select market, though. The things that sold best were really general items for any adult woman, like Jewelry, pillows, handbags, and key fobs. It was pretty close to Mother's day, so that may be another reason.


For my kits, I'll sell the rest at the next bazaar. I also advertized my photography business there. It was great to get a little more exposure! To be honest, in my preparation for this event, pretty much everything that could have gone wrong did go wrong. The printers were out of the photo paper I wanted and didn't print my orders on time, I sent other photos to the wrong stores, I had to run way more Errands than any person with a 2 month old should have, and I was scrambling to put everything together on the last night. It was kind of hectic to put it together in a week. It should have been easy, but it wasn't. But, saying all of that, it was still fun and has the potential to be really fun in the future!

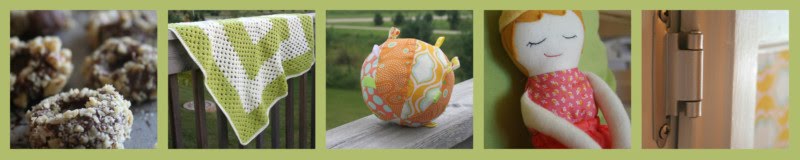
Look at all of this beautiful stuff they made. Cute!

Beautiful quilts, cute bowties, lovely signs and home decor, lots of fun baby stuff... it was great!

Posted by Picasa

Thursday, May 5, 2011

Magnetic paper doll tutorial

Over the Weekend, I participated in a craft bazaar where lots of fun ladies came together and sold items that they made by hand. It was way fun! I was selling these magnetic paper doll kits. These are a lot like the old ones, but with a few changes. I used to stick the doll clothes onto recycled magnets using modpodge. I found that after a bit of use, the clothes would ften come detached. So, I started using adhesive magnetic sheeting. I condensed the clothes onto one 6"x6" sheet. Here are the photo instructions for the people who bought the kits, as well as anyone else who's interested!

You will need:
1 boy dress up print out
1 girl dress up print out
6x6 square adhesive magnet
Altoids can
Mod-podge
Colored pencils (or your coloring instruments of choice)
Paintbrush
Scissors

Instructions:
1. Color. I prefer using colored pencils. (If you use something else, test the crayon/marker/pen on a corner of paper and paint a little mod-podge on it to make sure the color doesn’t smear or run. )
2. Eat mints. Mmmm.
3. Cut. Don’t cut out the clothes individually yet! Cut along the heavy black line to make a 6x6 square. Compare it to your magnet to make sure it is the same size. Carefully cut out the Boy or Girl.

4. Stick. Very carefully stick the 6x6 magnet to the 6x6 clothing paper.

5. Cut again. Cut out the clothing very carefully. Tip: try to cut with straight lines as much as possible.

6. Cut some more. Trace the back of the Altoids can onto a piece of paper. Cut along your tracing. This will be your background. (An alternative to this step is to spray paint the outside of the Altoids can.)


7. Glue.  Glue the background Paper you traced onto the back of the Altoids can. Glue the paper doll onto the background paper. Carefully Paint over the paper doll and background. Paint over each of the clothing items with the mod-podge. (Painting the items with Mod-podge will make them more water resistant.)


8. Let Dry.
9. Play! This is perfect for doctors’ offices, car, church, or just to keep in your purse!


Posted by Picasa

Bunny Pizzas

During the Easter season, we came up with this really fun festive food idea. We make homemade pizza a lot at our house. Usually we just use the Artisan bread in 5 minutes a Day dough for the crust, roll it out, sauce and cheese it and stick it in the oven. It's pretty easy.

For Easter, we did the same thing, but after we rolled it out, we cut out these bunny shapes and threw them on a sprayed pan. Then, we just topped each of them. You could do it with other shapes- I just wouldn't choose anything with much detail because they stretch a little and rise a little.


Serve it with some edamame and of course, root beer. Everybody loved this little festive meal!

Posted by Picasa

Wednesday, May 4, 2011

Craft Flashback: Blessing Dress

Our Aunt is the keeper of the dress. It arrived in the mail and I just wanted to hold my breath as I opened the box because it is so lovely and precious. This dress is about a hundred years old, so I'm told. It had delicate pin tucks on the yoke. It has beautiful, tiny flowers embroidered on the yold and the bottom. There is lace sewn all around the edges. Can you imagine making a dress like this? It is so detailed and gorgeous! The stitches are miniscule!


But the best thing about this dress is its history. Our three girls were each blessed in this dress. My husband was Christened in this dress. My Husband's Father was Christened in this dress. My husband's grandfather was christened in this dress. Each of their mothers and Fathers held them in this precious dress! There is so much family and love and history in this dress and that is why I love it.


Posted by Picasa